1. Overview
When using Chrome for video conferencing, streaming, or online classes, you may need to select a specific webcam. This is especially important if multiple webcams or virtual cameras are connected. In this guide, we will explain how to select and configure a webcam in Chrome.
2. How to Change Webcam Settings in Chrome
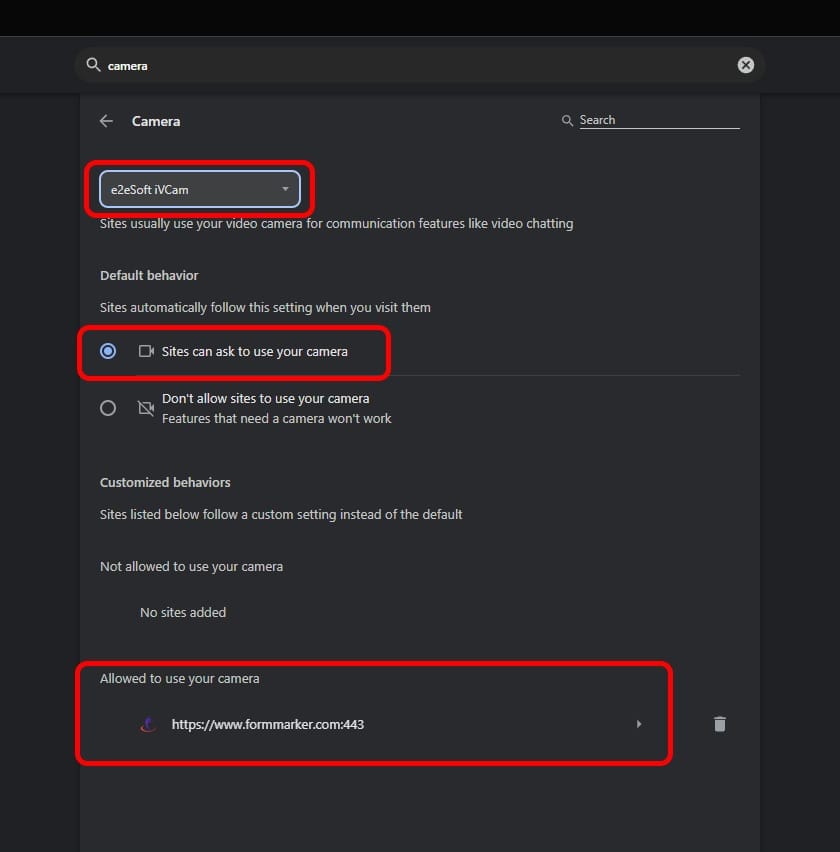
1) Checking Webcam Permissions in Chrome Settings
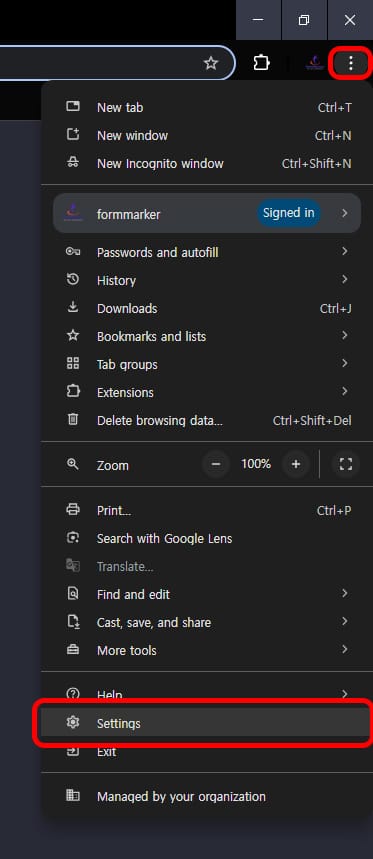
- Open the Chrome browser.
- Click on the three-dot menu (⋮) in the top-right corner and select Settings.
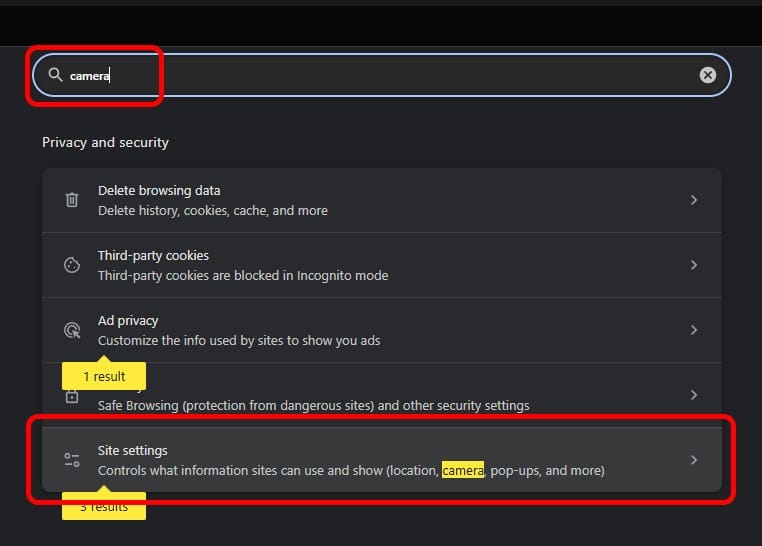
- Navigate to Privacy and security.
- Click on Site settings.
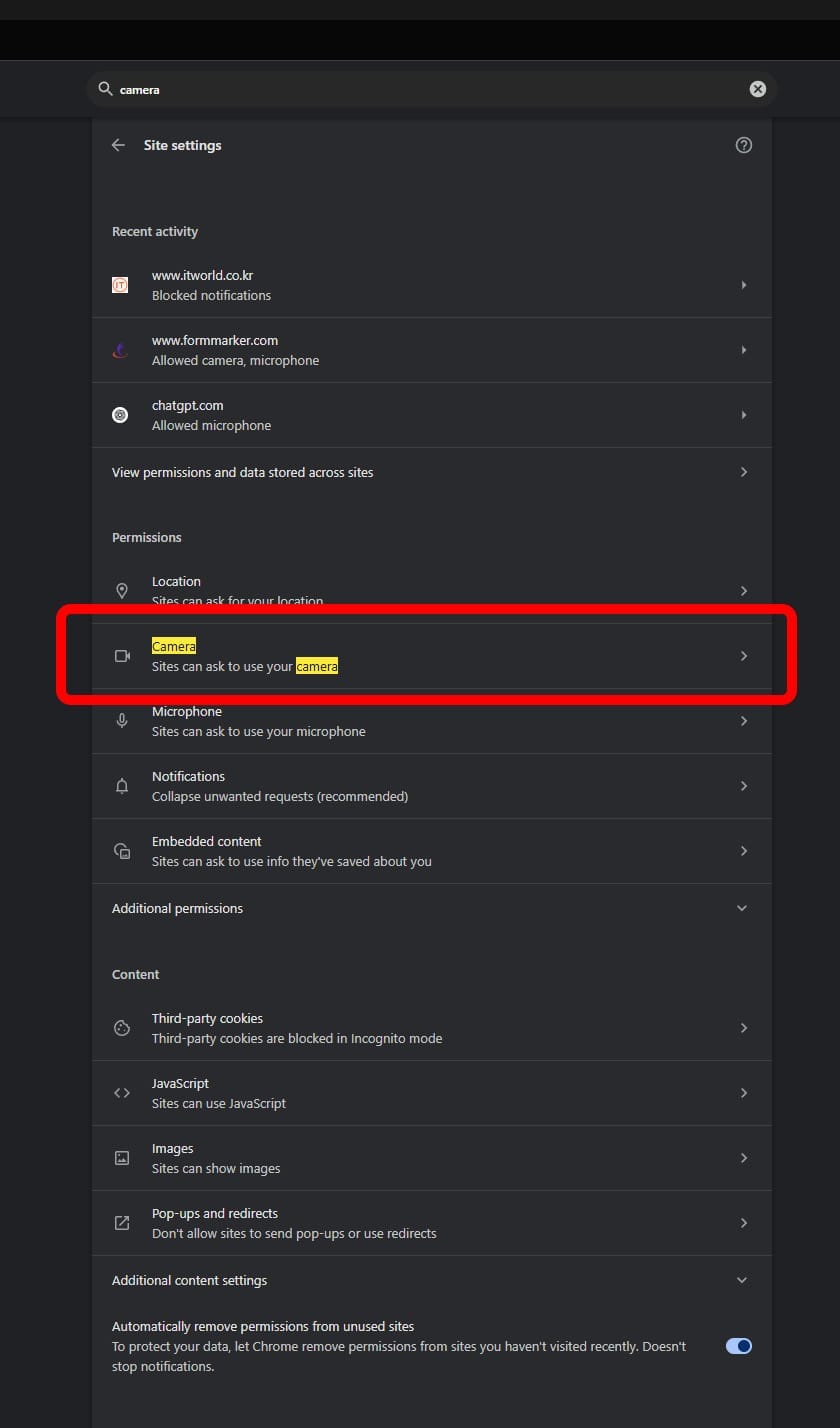
- Find and select Camera.
- Choose the webcam you want to use and make sure Chrome is allowed to access the camera.
2) Changing Webcam Settings for Specific Websites
- Open a website that requires webcam access (e.g., Zoom, Google Meet).
- Click on the lock icon🔒 or camera icon📷 in the address bar.
- In the camera permission settings, select the desired webcam.
- Refresh the page for the changes to take effect.
3. Troubleshooting: When Chrome Does Not Detect Your Webcam
1) Check Camera Permissions
- Windows: Go to
Settings > Privacy & Security > Cameraand ensure Chrome has access. - Mac: Open
System Preferences > Security & Privacy > Cameraand allow Chrome.
2) Restart Chrome and Update the Browser
- Update Chrome to the latest version by visiting
chrome://settings/help. - Restart Chrome after updating.
3) Check for Conflicting Applications
- If applications like Zoom or OBS are using the webcam, close them and try again.
4. Conclusion
Selecting and configuring a webcam in Chrome is simple, but issues like permission errors or conflicts can prevent proper detection. Follow the steps above to ensure your webcam works correctly in Chrome.